Automating Outlook and Excel with Python
One common task I’ve seen as part of an analysts responsibilities is to send out a daily status email about the sales numbers, fiscal projections, etc.
Many execs find these emails useful as a quick way to stay up to date on the financial numbers of a company. That said, sending an email on a daily cadence is a task primed for automation, let’s see how to do it.
We can break this task down into a few component parts.
□ open an excel report
□ refresh the numbers in the excel Report
□ take screenshots of the relevant numbers
□ create a new email from a template (maybe by opening & editing yesterday's report)
□ populate the email with relevant contextual information
  □ today's date
  □ specific numbers from the report
As we’re interfacing with two Office products (Excel and Outlook), VBA would be a good language to use to script these interactions. That said, VBA has some limitations. It has to live as an extension to one of the products instead of a standalone file, it can’t be set to automatically run on a cadence, and overall it’s just a very limited language.
Therefore, I’ve decided to leverage Python to tackle this task by using a library called win32com that let’s us write VBA-esque code in Python. This gives us the best of both worlds.
Opening & Refreshing Excel
import win32com.client as win32
xl = win32.Dispatch("Excel.Application") #Reference to excel application
wb = xl.ActiveWorkbook #Reference to excel file
This code gives us a direct reference to whichever excel file we have open.1
If we don’t even want to be bothered opening the report manually, we can set wb to a specific file by using wb = xl.workbooks.open(<path_to_excel_workbook>).
So, wb = xl.workbooks.open("C:/Users/samco/Desktop/Book1.xlsx") will automatically open our workbook for us. Neat!
Now, we can directly mess with things in Excel via code. Try it out!
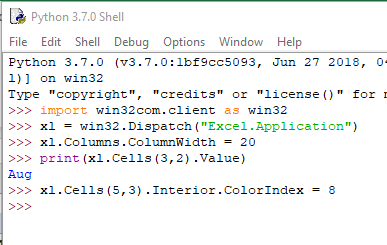
xl.Columns.ColumnWidth = 20
#set every column to width 20

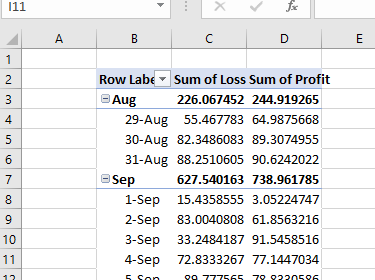
xl.Cells(3, 2).Value
#grab the value of cell A2 (row 3 column 2) in the current sheet

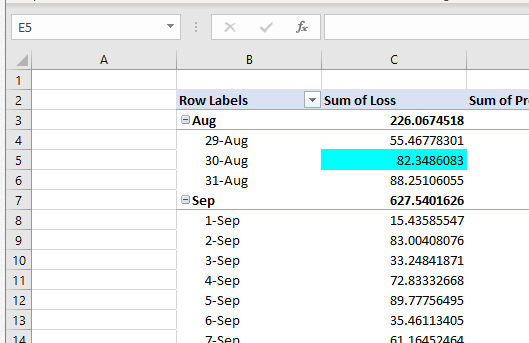
xl.Cells(5,3).Interior.ColorIndex = 8
#set the color of cell C5 (row 5 column 3) to cyan.


To make sure we have the most up to date numbers locally, we’ll want to refresh our pivot table. Sure we could just hit the Refresh All button ourselves, but clicking buttons is so last year. We can use wb.RefreshAll() to do it for us.
Saving pictures
Now we need to get pictures of the updated data for our email.
xl.Range("A1:H5").Copy()
#copy range onto clipboard as a picture

ImageGrab.grabclipboard().save('paste1.png', 'PNG')
 #save that picture in the current working directory

Nice.
Populating the email
Now that we have everything we need, let’s generate that email.
from datetime import datetime
outlook = win32.Dispatch('outlook.application')   #get a reference to Outlook
mail = outlook.CreateItem(0)                      #create a new mail item
mail.To = 'executives@bigcompany.com'
mail.Subject = 'Finance Status Report '+datetime.today().strftime('%m/%d')
#put today's date in subject line
As for the body of the report, we will pass in HTML code using mail.HTMLBody = with the following.
'''
<p>Hi Team,</p>

<p>This email is to provide a status of the our current sales numbers</p>


<img src='C:\\Users\\sam\\Desktop\\EmailAuto\\paste1.png'>


<img src='C:\\Users\\sam\\Desktop\\EmailAuto\\paste2.png'>


<p>Thanks and have a great day!</p>
'''
finally, we can make this mail item visible with a mail.Display().
(We could also just send it with a mail.Send(), but I’ve found people usually prefer to give the email a once-over before sending it out).

And that’s it! With a script like this I’ve generally been able to save ~15 minutes of time per email, not to mention the reduced chances for human error. One click is now all it takes.
-
If you have multiple excel reports open at once, wb will reference whichever report you’ve interacted with most recently. ↩